
This post is all about Ansible. 2016 saw the release of Ansible 2, which comes with a few new features however the bulk of the effort in version 2 looks to have been in refactoring. Regardless, I have found that my job often requires me to be doing lots of dull tasks on multiple servers. Whilst we have some older servers with some quite, ahem, bespoke and quirky setups making them unsuitable for integration into a configuration management system - some tasks can be performed en-masse using Ansible.
So Why Ansible?
Unlike configuration management systems like Puppet and Chef, Ansible doesn’t require an agent - all automation tasks are done over SSH. Ansible is also pretty easy to configure, playbooks (a list of actions) being defined inside a YAML file.
How do I try it out?
I’m the kind of person who doesn’t like trying out things on live servers, be it wisdom or common sense. My first port of call is a VM, sometimes on AWS but often in VirtualBox. Recently I became a big fan of Vagrant because I can set up consistently repeatable development environments for testing applications so considering Ansible now works with Vagrant this is a good starting point. What is more interesting is that we can also build a quick collection of VMs in Vagrant instantly to test our newly found Ansible-fu on.
Prerequisites
Before you start I highly recommend that the machine you work on is a minimum of an Intel i5 processor with 8GB of RAM. Both my work and home computers exactly match this spec however my work computer does struggle. I have done this on a Mac as well as on an Ubuntu 14.04 desktop and a Debian Jessie desktop, as such this guide is written in the most compatible way to either type of system. Let’s round up what you will need:
- Linux / Mac OS X
- Intel i5 or greater
- >= 8GB RAM
- VirtualBox
- Vagrant
- Python (with pip).
Installing Ansible
I’m skipping the VirtualBox/Vagrant bit as that should be very straight forward, if in doubt search the internet. I’m also assuming you have a copy of Python 3 and pip installed on your computer - again this is easy to achieve. We aren’t bothering with package managers for installing Ansible as they are often out of date.
First thing is first. As root, run:
pip install ansible
Wow. Is it that simple? Yes.
Creating our Lab
Here’s where the tricky part is, creating a load of Virtual Machines for us to manage using Ansible. Vagrant, however, will make this a lot simpler for us. Ideally as individuals new to Ansible we want to be testing all aspects of server ownership, from provisioning to management, on a cluster of VMs to get a feel for what we can achieve. In this example we are just going to fire up 3 Ubuntu 14.04 servers. Like me you may have a mixed selection of servers in your ecosystem but we can group hosts in Ansible which allows us finer tuning of tasks upon our servers, specific to their needs.
Download Ansible Lab from GitHub to get a copy of the files used in this tutorial.
Then checkout to v1.0.0
git checkout v1.0.0
Lets create our Vagrantfile:
{% raw %}
# Using Vagrant version 2. No ifs or buts. Vagrant.configure("2") do |config|
    # Number of nodes. On an i5 with 8Gb RAM I use 3.
    N = 3

    # Iterate for nodes
    (1..N).each do |node_id|
        nid = (node_id - 1)

        # Define our node
        config.vm.define "node#{nid}" do |n|
            n.vm.box = "trusty64"
            n.vm.box_url = "http://cloud-images.ubuntu.com/vagrant/trusty/current/trusty-server-cloudimg-amd64-vagrant-disk1.box"
            n.vm.boot_timeout = 600
            n.vm.hostname = "node#{nid}"
            n.vm.network "private_network", ip: "10.8.10.#{10 + nid}"

            n.vm.provider "virtualbox" do |vb|
                vb.name = "node#{nid}"
                vb.memory = 512
            end

            # If this is our last node, lets provision all.
            if node_id == N
                n.vm.provision "ansible" do |a|
                    a.limit = "all"
                    a.verbose = "v"
                    a.playbook = "provision.yml"
                end
            end
        end
    end
end
{% endraw %}
This Vagrantfile launches 3 nodes (you can change very easily this if you like, just alter the variable ‘N’). Each of these nodes is created from an Ubuntu 14.04 server image provided by Canonical. On each of these we have set up the hostname to be node0, node1, node2 etc. and given them an IP address of 10.8.10.(10 + nodeid).
To make sure these 3 VMs are up to date with the latest software, we are going to use Ansible to run a provision script called provision.yml.
In provision.yml we want to do two things:
- Apply all package updates in apt
- Insert an SSH key so that we can manage the machines without using
vagrant ssh.
To do this the playbook looks something like this:
{% raw %}
---
- name: Provision OS
  hosts: all
  vars:
    - ansible_key: assets/ansible_rsa
    - ansible_pub_key: assets/ansible_rsa.pub
  tasks:
    - name: Upgrade OS
      become: yes
      become_method: sudo
      apt: upgrade=dist update_cache=yes

    - name: Insert (bad) Ansible Key
      authorized_key: user="vagrant" key="{{ lookup('file', ansible_pub_key) }}" state=present
{% endraw %}
Now we have written our provisioning playbook and our Vagrantfile, let’s fire it up.
vagrant up
You will get to this point of provision that looks like it is stuck. Go grab yourself a coffee, this may take some time…
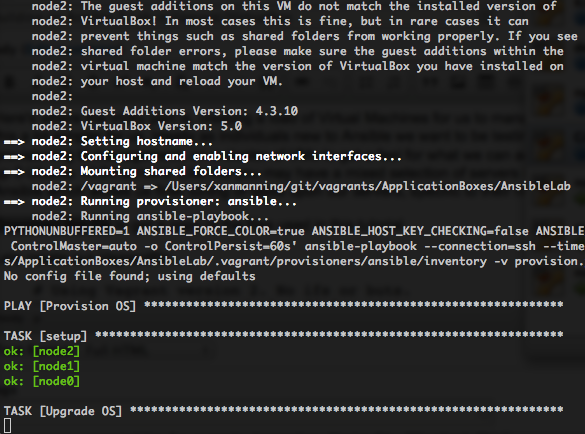
Once this has done you should get a playbook summary (Play Recap) as below:

An indicator of success is having 0 unreachable and 0 failed.
Diving into Playbooks, what next?
With Ansible everything is done over SSH. This means that there is one task yet to do before we can dive in and that is to connect to our VMs for the first time. Remember that you are always prompted to verify the RSA fingerprint on a new SSH connection for the first time.
To save time, issue the following command:
chmod 0600 assets/ansible_rsa ; ssh -i assets/ansible_rsa [email protected] 'echo $HOSTNAME' ; ssh -i assets/ansible_rsa [email protected] 'echo $HOSTNAME' ; ssh -i assets/ansible_rsa [email protected] 'echo $HOSTNAME'
and type ‘Yes’ to each prompt.
Let’s add that new key to our keychain.
ssh-add assets/ansible_rsa
Now we have verified the authenticity of our hosts, lets add them to our Ansible hosts file (/etc/ansible/hosts). I’ve added a host group called ‘vagrants’ for easy access and added the login user of ‘vagrant’ to each one of my VMs. Note that on a Mac you won’t have /etc/ansible/hosts on your OS, instead you can set the path to your hosts file in your shell config.
(Required on Mac OS X Only)
export ANSIBLE_HOSTS=path_to_hostfile
Here is the host group in our hosts file:
[vagrants]
10.8.10.10         ansible_ssh_user=vagrant
10.8.10.11         ansible_ssh_user=vagrant
10.8.10.12         ansible_ssh_user=vagrant
Trying an example playbook
Now, let’s try our first playbook, one that we will notice a change in state. In the example files I have provided, we are going to run bashrc.yml. This playbook specifically changes the $PS1 prompt in bash so that it is all pretty colours. To first take a look at the prompt, log in to any of the three nodes.
ssh [email protected]
You will notice the dull default prompt.

Now type exit so that we can run our playbook. To do this, run:
ansible-playbook playbooks/bashrc.yml
Once complete, log in to any of the three nodes and you will notice the new coloured prompt.
ssh [email protected]

And voilla, this has been run on ALL your nodes. Go forth and play with Ansible.
Download Ansible Lab from GitHub
Then checkout to v1.0.0
git checkout v1.0.0